How to paint in acrylics
New to acrylics? Learn which tools to buy, how to mix colours, and the key techniques — from basic brushstrokes to advanced impasto — in this beginner's guide.
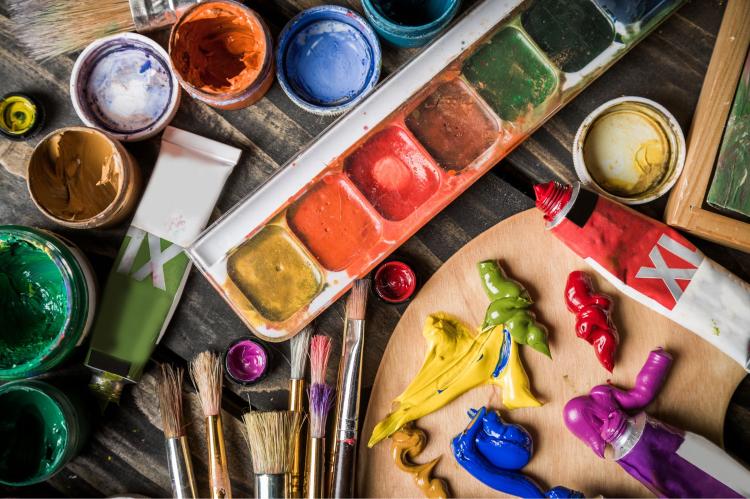
Getting started — your essential acrylic toolkit
Acrylic painting is a versatile and beginner-friendly medium, but having the right tools can make all the difference.
What types of acrylic paint should a beginner buy?
Here's something reassuring: you don't need much to begin. Acrylic paints come in two main grades — student and artist. Student-grade paints (think Winsor & Newton Galeria, or Liquitex Basics) are more affordable and perfectly fine while you're learning. Artist-grade paints have higher pigment concentration and richer, truer colours, but they cost more. Start with student grade and upgrade selectively as your skills develop.
For colours, resist the urge to buy a set of 36. A limited palette teaches you far more about colour mixing:
- Primary colours: cadmium red (or a warm red hue), cadmium yellow, ultramarine blue
- Secondary colours: you'll mix these yourself — orange, green, violet
- Neutrals: titanium white (you'll use a lot of this) and ivory black
That's seven colours. With these, you can mix almost anything.
Which brushes do you actually need for acrylic painting?
Brushes come in a few core shapes, and each does something specific.
| Brush shape | Best used for |
| Flat | Broad strokes, filling large areas, sharp edges |
| Round | Detail work, lines, curved strokes |
| Fan | Blending, foliage, textured effects |
| Filbert | Soft edges, petals, natural shapes |
| Liner / Rigger | Fine lines, lettering, intricate detail |
A good starter kit? One large flat, one medium round, one small round. Synthetic brushes work well with acrylics and are easier to clean than natural hair. Always rinse brushes in water while you work — dried acrylic paint is effectively plastic, and it will ruin bristles permanently.
What surface should you paint acrylics on?
Acrylics are remarkably flexible. They'll stick to almost anything that isn't greasy or shiny. Common options include:
- Canvas (stretched or canvas board): the classic choice, with a texture that holds paint well
- Acrylic paper: inexpensive, great for practice and studies
- Wood panels: smooth and rigid, ideal if you prefer a flat surface
- Watercolour paper (300gsm or heavier): works surprisingly well for looser, washy styles
Many surfaces need a primer — typically white gesso — applied first. This seals the surface and gives the paint something to grip. Pre-primed canvases come ready to use straight from the packet.
What other supplies do you need?
Keep it simple:
- Palette: a stay-wet palette keeps acrylics workable longer. A ceramic tile or even a sheet of glass works well too.
- Water containers: use two — one for rinsing dirty brushes, one for clean water to thin your paint.
- Easel: helpful but not essential. A table easel works fine for most beginners.
- Paper towels or rags: you'll go through more than you expect.
Mastering the basics — techniques for beginners
Mastering the basics is an essential step for anyone starting their journey in a new skill or discipline. There are a few foundational techniques that will equip beginners with the tools they need to build confidence and create a solid groundwork for future success. By understanding and applying these fundamental principles, anyone can develop the habits and skills necessary to progress effectively.
How does colour mixing work in acrylic painting?
Think of colour as a map. The colour wheel — the circular arrangement of hues — shows you how colours relate to each other. Mix two primary colours and you get a secondary: red + blue = violet, yellow + blue = green, red + yellow = orange. Mix a primary with a secondary and you get a tertiary colour (red-orange, blue-green, and so on).
A few practical rules that save a lot of frustration:
- Mix light into dark, not the other way round. A little white goes a long way; a little black can muddy a colour quickly.
- Complementary colours (those opposite each other on the wheel, like orange and blue) neutralise each other when mixed. Use this to dull or shadow a colour naturally.
- Always mix more paint than you think you need. Matching a mixed colour again is nearly impossible.
How much water should you add to acrylic paint?
This is one of the most common beginner questions — and it has a nuanced answer.
A small amount of water (up to about 30% of the paint volume) makes the paint flow more smoothly without harming it. Add more than that, and you risk breaking down the acrylic binder, leaving a chalky, fragile film once it dries.
For thinner, more transparent applications, acrylic mediums — like matte medium or glazing liquid — are a better choice than water alone. They dilute the paint without compromising its structure.
What are the essential brushstroke techniques for acrylic painting?
Four techniques form the backbone of most acrylic painting:
- Flat wash: thin, even layer of diluted paint, great for backgrounds and skies
- Dry brush: a mostly-dry brush dragged lightly across a textured surface, creating a broken, scratchy effect excellent for fur, grass, and wood grain
- Stippling: dabbing the tip of a brush to build up texture and tone, one dot at a time
- Glazing: applying a thin, transparent layer of colour over a dry layer, subtly shifting the hue beneath — similar to looking through tinted glass
How do you layer and blend colours in acrylics?
Acrylics dry fast — typically within minutes, depending on humidity and paint thickness. That speed is both a gift and a challenge. You can build up layers quickly without muddying the colours beneath, but you have to work fast if you want wet-into-wet blending.
To blend while wet, work in small sections and keep a fine mist of water nearby to slow drying. For smooth gradients, try wet-on-wet with a soft brush and gentle, circular strokes. A retarder medium (more on this in Chapter 3) can extend the drying time significantly, giving you more working time.
Advanced acrylic techniques
Let us explore advanced techniques in acrylic painting, helping you push the boundaries of your creativity and refine your skills.
What is impasto painting, and how do you do it with acrylics?
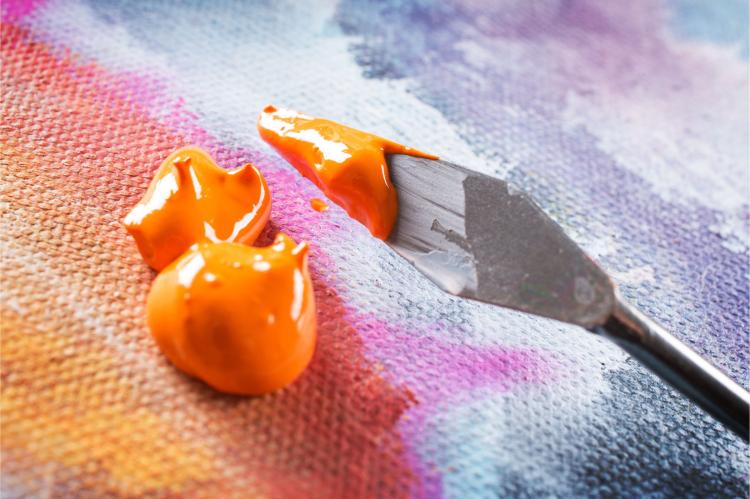
Impasto is the technique of applying paint very thickly so that brush or palette knife marks remain visible in the final surface. Think of Vincent van Gogh's swirling, textured skies — that's impasto in action. With acrylics, you can achieve this either by using undiluted paint straight from the tube, or by mixing in an impasto medium (a thick, heavy-bodied gel) that increases volume without changing the colour.
Use a palette knife rather than a brush for the most dramatic texture. It creates flat ridges and peaks that catch light beautifully.
What is sgraffito in acrylic painting?
Sgraffito (from the Italian word for "scratched") involves dragging a pointed tool — a palette knife, a pencil end, even a credit card — through wet paint to reveal the layer beneath. It's a quick way to add fine lines, grass, or wood-grain textures that would be difficult to paint with a brush.
How do acrylic pouring and dripping techniques work?
Fluid acrylic painting has exploded in popularity in recent years, partly because the results can look spectacular with relatively little experience. The basic idea: thin your paint significantly (using pouring medium rather than water), pour two or more colours onto a tilted canvas, and let them flow and interact.
Techniques vary — some artists use cups, others apply paint with syringes or squeeze bottles. You can tilt the canvas to guide the flow, or use a torch to pop air bubbles and encourage the paint to "cell" (form circular patterns). The results are unpredictable in the best way.
What are the most useful mediums for acrylic painting?
Mediums are substances mixed into acrylic paint to change how it behaves. Here are the most practical ones for developing artists.
| Medium | What it does |
| Gloss/matte medium | Changes finish; can also be used as a glue or varnish |
| Retarder | Slows drying time for better blending |
| Glazing liquid | Creates thin, transparent layers |
| Impasto medium | Adds body and texture |
| Pouring medium | Thins paint for fluid techniques |
| Varnish | Protects finished paintings |
Experiment with one medium at a time. Each changes the behaviour of your paint in ways that take a little getting used to.
Planning your Masterpiece — composition and design
Crafting a masterpiece begins with thoughtful planning and a clear sense of direction. Composition and design are the cornerstones of any successful creation, serving as the framework that brings your vision to life.
What is composition, and why does it matter in painting?
Composition is the arrangement of elements within your painting — where things sit, how the eye moves around the canvas, what draws attention first. It's the invisible structure that determines whether a painting feels balanced and engaging or chaotic and flat.
A few reliable principles:
- Rule of thirds: divide your canvas into a 3×3 grid. Place your main subject or horizon line along one of the grid lines, or at an intersection point, rather than dead centre. It creates a more dynamic, interesting image.
- Leading lines: roads, rivers, fences, and shadows can all be used to draw the viewer's eye towards your focal point.
- Focal point: every painting benefits from one clear area of interest. Give the viewer somewhere to look.
How do you paint light and shadow convincingly?
Light and shadow are what give a painting dimension. Without them, objects look flat — like coloured shapes rather than solid things.
The key concept is form shadow (the dark side of an object, away from the light source) versus cast shadow (the shadow the object throws onto surrounding surfaces). Observe both carefully in your reference image, and notice that shadows aren't simply a darker version of the base colour — they often shift slightly towards blue or violet.
A simple exercise: paint a single sphere from a reference photo. Getting the light, form shadow, cast shadow, and the subtle reflected light on the dark side right will teach you more than almost any other single exercise.
How do you use reference images without just copying them?
Reference images are a tool, not a crutch. Using them effectively means selecting information rather than transcribing it. Look at a reference for colour, light direction, and proportion — then paint what you understand, not what you see.
Useful strategies include:
- Flipping the reference image horizontally to see it fresh
- Working from multiple references rather than one
- Making quick thumbnail sketches before committing to canvas, experimenting with different compositions
Troubleshooting and tips for success
Let us anticipate common challenges you may encounter and provide practical tips to help you overcome them, ensuring a smoother path to success.
How do you deal with acrylic paint drying too fast?
Fast drying is acrylic's defining characteristic — and its most common frustration for beginners. Practical fixes:
- Use a stay-wet palette: a damp sponge beneath palette paper keeps paint workable far longer
- Add a retarder medium to your paint, particularly when blending
- Mist your palette occasionally with a spray bottle
- Work in smaller sections so you're not racing against the clock across the whole canvas
How do you avoid muddy colours when painting with acrylics?
Muddy colour usually comes from one of three causes: mixing too many colours together, using a dirty brush, or overlapping two complementary colours unintentionally. The fixes are straightforward:
- Rinse your brush thoroughly between colours
- Use a limited palette — fewer colours means fewer mixing accidents
- Let layers dry fully before applying the next, so wet colours don't blend unintentionally on the canvas
How should you clean and maintain your acrylic brushes?
Clean brushes immediately after use — never let acrylic dry in the bristles. Rinse in water, then work a small amount of brush soap or baby shampoo through the bristles and rinse again. Reshape the tip and store upright or flat (never bristle-down in a jar). A brush conditioner, such as The Masters Brush Cleaner, can restore neglected brushes and extend their life considerably.
How do you varnish and protect a finished acrylic painting?
Varnishing seals the surface of a finished painting, protecting it from dust, UV light, and moisture. Wait until the painting is fully cured — this can take days to weeks depending on paint thickness — then apply an isolation coat (a layer of soft gel medium) before varnishing. This makes the varnish removable later without affecting the paint beneath.
Varnishes come in gloss, satin, and matte finishes. Apply in thin, even coats with a wide, soft brush in a well-ventilated space.
Any other questions
Is acrylic painting suitable for absolute beginners with no art experience?
Yes. Acrylic is widely considered the most beginner-friendly painting medium. It dries quickly, cleans up with water, can be painted over if you make mistakes, and works on a wide range of surfaces. You don't need prior drawing experience to start, though basic sketching skills will help with planning compositions.
How long does acrylic paint take to dry?
Thin layers of acrylic paint typically dry to the touch within 20–30 minutes, depending on humidity and temperature. Thicker applications can take several hours. Full curing — when the paint is chemically stable throughout — takes longer, sometimes several weeks for heavy impasto work.
Do you need to stretch canvas before painting with acrylics?
Pre-stretched and pre-primed canvases are available ready to use, making this unnecessary for most beginners. If you want to stretch your own canvas, it's a useful skill but not essential at the start. Canvas boards (canvas glued to a rigid backing) are a cheaper and equally effective alternative.
What's the difference between soft body and heavy body acrylic paint?
These terms describe paint consistency. Heavy body acrylics are thick — similar to oil paint — and hold brush and knife marks well. Soft body acrylics have a smoother, more fluid consistency suited to detail work and smooth blends. Both contain the same acrylic pigment; the difference is purely in texture.
Can you paint acrylics over oil paint?
No — and this is worth knowing early. You can paint oil over acrylics once the acrylic layer is dry, but never the reverse. Oil is flexible; acrylic dries into a slightly rigid film. Acrylic applied over oil is likely to crack and peel as the layers move differently over time.
How do you fix a mistake in an acrylic painting?
The good news: acrylics are forgiving. Once a layer is dry, you can simply paint over it. For more significant corrections, apply a few layers of gesso (white primer) over the area first, let it dry, and repaint from scratch. Mistakes in acrylics are rarely permanent.
Start painting — the canvas is waiting
Acrylic painting rewards curiosity and patience in roughly equal measure. You'll mix a colour that surprises you. You'll ruin a corner and fix it. You'll look at a finished piece and feel that quiet satisfaction of having made something that didn't exist before.
The most important step is also the most obvious one: start. Pick up a brush. Put paint on a surface. Make something imperfect and learn from it.
As you develop, keep a sketchbook or photo record of your experiments — even the failed ones. Review them after a few months. The improvement will be there, even when it's hard to see in the moment.
If you want to accelerate your progress, joining a local painting group or online community can provide feedback, fresh perspectives, and a sense of shared enthusiasm that's genuinely hard to replicate alone. Look for life drawing groups, open studio nights, or communities on platforms like Reddit's r/learnart or Wet Canvas.