How to stencil
My first attempt at stencilling was a soggy little smudge of a robin, its outline so blurred it could have been a potato. I had done what feels natural — loaded the brush generously, because surely more paint means more colour — and pressed it firmly over the cut-out. The paint promptly crept under every edge. What I'd made wasn't a stencil so much as a rumour of one.
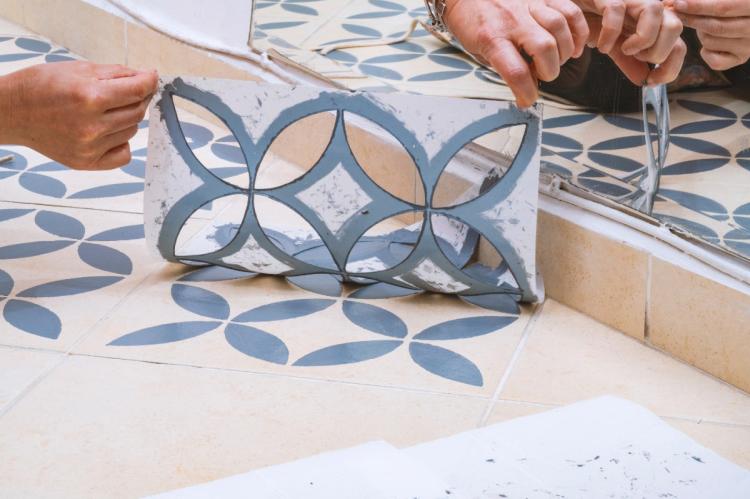
Here's the good news, and it's the whole secret of the craft: that blurring has one main cause and one simple cure. Bleed under the stencil comes from too much paint on the brush, and the fix is to use far less than instinct tells you. Master that single habit and everything else — cards, cushions, walls, a tote bag — becomes genuinely easy. This guide will get you from smudge to sharp edge, and show you why each step works.
What stencilling actually is
Stencilling is about the oldest way there is to repeat a design: you cut a shape out of a sheet, hold it against a surface, and apply colour through the gap. Lift the sheet and the shape is left behind, ready to be repeated as often as you like. That's the entire principle, and it's why one stencil can decorate a whole row of napkins identically.
It is also ancient. Palaeolithic painters pressed a hand to a cave wall and blew pigment around it, leaving a stencilled silhouette, and Pacific islanders cut holes in leaves to print bark cloth. Its most exquisite tradition is Japanese katagami— intricate stencils cut from mulberry paper, waterproofed with persimmon tannin and held together with fine threads, used in the rice-paste resist dyeing called katazome from around the eighth century. The Victoria and Albert Museum holds a large collection of them, and their patterns later influenced European Art Nouveau. You are joining a very long queue.
Choosing a stencil
Stencils come in a few materials, and the job decides the choice. Acetate or mylar (clear, flexible plastic) is the beginner's friend: you can see through it to position it, it bends around curved objects, and it's tough enough to reuse many times. Brass stencils are small and precise, good for card-making and embossing. Card stencils are cheap and fine for children or simple one-off designs, but they soften once paint dampens them. Laser-cut plastic stencils give crisp, complex designs off the shelf. So-called layered or multi-part stencils, where separate sheets add successive colours, are for when you're ready to level up.
For your first go, buy one ready-made acetate or plastic stencil with a bold, open design — nothing too fine. Delicate script and lacy detail are far less forgiving of a wobbly hand. You can always cut your own later (there's a short how-to at the end).
Paint and applicator
Almost any paint can be stencilled, but they aren't equally kind to beginners. Water-based paints — ordinary acrylics, or dedicated stencil crèmes — are the easy, low-hassle choice: they clean up with soap and water and skip solvents entirely. Oil-based sticks such as Markal Paintstiks give lovely soft blends, but they need white spirit to clean up and a long cure, which is more faff and more hazard than a first project wants. Start water-based.
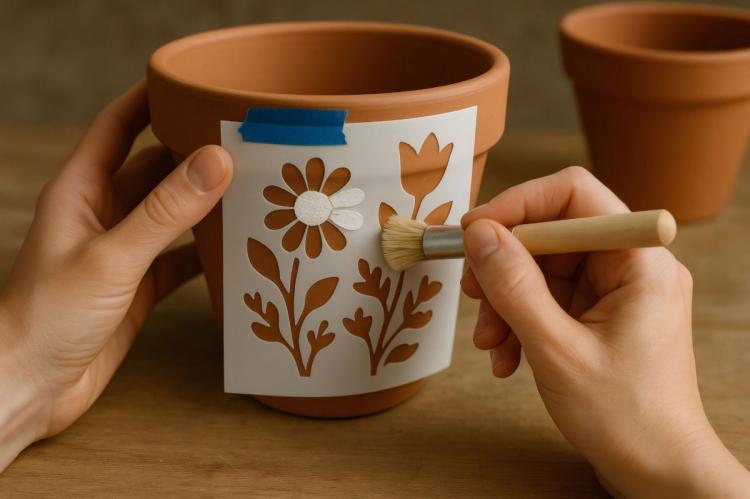
For the applicator, the classic tool is a stencil brush — short, dense, flat-topped bristles built for a dabbing action. A sponge (or a cosmetic wedge) gives a softer, mottled finish and suits liquid paint well; blot it first. A small foam roller is quick for large, repeated areas. Whichever you use, the golden rule is the same and it's coming next. As any experienced stencil tutor will tell you, the tool matters far less than how much paint you don't put on it.
The one skill: a near-dry brush
If you remember one thing, make it this. Dip the brush, then offload most of the paint onto kitchen paper — keep going until the brush feels almost dry and you'd swear there's barely any colour left. Think of applying make-up, not painting a wall. It looks like far too little. It isn't.
Then build the colour in thin layers, tapping straight up and down (stippling) or working in small light circles (swirling). Both work; what matters is that you're depositing colour gently onto the surface, not dragging it sideways towards the cut edge, which is exactly how paint gets forced underneath. If the shape looks pale after one pass, do another — thin coats build a clean, even colour that a single heavy coat never will.
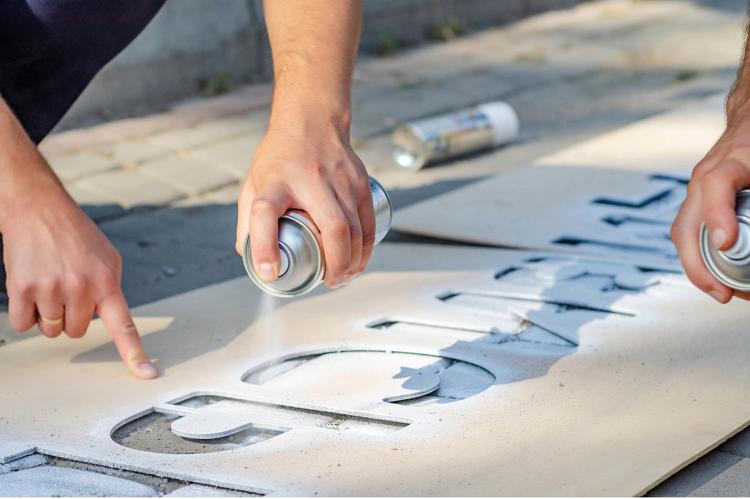
The other half of a crisp edge is a stencil that doesn't move. Secure it with a light mist of repositionable spray adhesiveon the back, which holds fine detail flat all over, or with low-tack painter's tape for larger, simpler designs. Give spray adhesive a minute to turn tacky before you position the stencil. (Use spray adhesive in a ventilated space, away from flames — it's a flammable aerosol.)
Watch out: overloading the brush is behind almost every ruined stencil. If in doubt, offload more. Most beginners use two or three times more paint than they need.
Surfaces and set-up
Stencil onto a surface that's clean, dry and not glossy — paint grips a matte or eggshell finish far better than a shiny one, and dust or grease creates tiny gaps where paint sneaks under. Always do a practice run on scrap paper first: it tells you your colour, your pressure and your spacing before you commit to the real thing. And when you're working on fabric or anything paint could soak through, slip a protective sheet underneath to guard against bleed-through to the surface below.
Repeats and more than one colour
The magic of stencilling is repetition, and lining up a repeat is mostly about a steady eye. Many stencils include faint registration marks or a bit of the previous motif you can line up against; if not, a couple of light pencil ticks along a level guideline keep a border straight. Work along in one direction and don't rush the spacing.
For more than one colour, the simplest route is to mask off the parts of the stencil you don't want in a given colour with tape, paint the exposed areas, then re-mask for the next colour. Use a clean, dry brush for each colour — a damp or dirty brush muddies everything — and during a long repeat, wash the stencil now and then so dried paint doesn't build up on the edges and coarsen your lines.
Stencilling on fabric
Fabric is the surface most people want, and it needs a little extra care. First, wash and dry the item to remove the sizing manufacturers add, but skip fabric softener, which leaves a residue paint doesn't like. Then — the bit the old leaflets miss — mix a fabric (textile) medium into your acrylic. Straight acrylic dries stiff on cloth and can crack or wash away; fabric medium binds the paint to the fibres so it stays flexible and launderable.
Whether you must heat-set depends on the product, so read the label. Golden's GAC 900, for instance, is blended roughly one-to-one with acrylic and must be heat-set with an iron to fuse into the cloth; Liquitex's fabric system is formulated to be permanent without heat-setting. Either way, let the paint dry fully first (often around 24–48 hours), press on the reverse or through a cloth, and follow the maker's temperature. Above all, test on a scrap of the same fabric — colours and absorbency vary, and cloth behaves quite differently from paper. Keep the same near-dry, don't-thin-it approach: thin paint floods under the edge on fabric even more readily than on paper.
Your first project: a repeat-motif tote bag
Let's put it together on a plain cotton tote bag, using a single colour and one simple stencil. (No fabric to hand? Do the same on a set of folded blank cards for gift tags — skip the fabric-medium and heat-set steps.)
- Prep. Wash and dry the bag (no softener). Slip a sheet of card inside so paint can't strike through to the back.
- Mix. Combine your acrylic with fabric medium per the label (often about 1:1). Do a test dab on a scrap.
- Position. Mist the stencil back lightly with repositionable adhesive, let it go tacky, and press it flat where you want the first motif.
- Paint. Load the brush, offload most of it, then stipple or swirl thin layers until the shape reads cleanly. Resist adding more paint.
- Repeat. Peel the stencil up cleanly, reposition for the next motif along your guideline, and carry on. Wipe the stencil if paint builds on the edges.
- Set. Let it dry fully, then heat-set if your medium requires it, pressing on the reverse or under a cloth.
That's a finished, washable piece built entirely from offloading, stippling and a steady repeat. Nothing fancy — just the habit.
When it bleeds or blotches: quick fixes
- Edges bleeding: too much paint, or a lifting stencil. Offload more, press the stencil down (add adhesive/tape), and touch up stray marks with a fine brush in the background colour once dry.
- Patchy, thin colour: you're being too timid, or lifting the stencil before you're done. Add another thin layer before moving the stencil.
- Stencil slipping: clean the surface, and add repositionable adhesive or more tape.
- Ghosting on repeats: dried paint on the stencil edges. Wash and dry the stencil mid-run.
- Paint dried on the brush: acrylic sets hard fast — rinse promptly; prevention is the only real cure.
Clean-up, storage and safety
Clean brushes before the paint dries: warm soapy water for water-based paints, and don't let them soak so long the bristles bend at the root. Wipe the stencil clean and store it flat, ideally between two sheets of card so it can't crease. A light dusting of talc or cornflour on the back reduces leftover tackiness from spray adhesive — just don't breathe in loose powder, and cornflour is a fine talc-free alternative.
A fair word on safety, since the tidy old leaflets tend to gloss over it. Water-based paints are the low-risk choice, but rinse water still carries pigment and acrylic (microplastic) particles, so let the jar settle, pour off the clearer water and wipe the sludge into the bin rather than flushing lots down the sink. Some artist colours — cadmiums, cobalt — are genuinely toxic and shouldn't be spray-applied; the AP/CL seals on the tube tell you what you're handling.
If you use oil-based sticks or paints, treat white spirit with respect: it's flammable, its vapour shouldn't be breathed, and it's hazardous waste — never pour it down the drain; take it to a household hazardous-waste point. And lay solvent-soaked rags flat to dry outdoors or seal them in a metal or water-filled container, because bunched-up solvent rags can catch fire on their own. Work with the window open, and you avoid most of the risk simply by choosing water-based paint in the first place.
Cutting your own stencil
Once you've caught the bug, cutting your own is straightforward. Draw or print your design, lay clear acetate over it and trace with a water-soluble pen (on card, use pencil you can rub off later). Cut it out with a sharp craft knife on a cutting mat, turning the sheet into the blade for smooth curves rather than twisting your wrist. Leave bridges — small connecting strips — so that "islands" like the centre of a letter O don't fall out. Push the cut pieces free, wash off the pen marks, and you have a stencil no one else owns.
Start with one shape
The best first step is tiny: take one simple stencil, load a brush, offload almost all of it onto kitchen paper, and do three light dabs on scrap. Watch how little paint gives a clean, sharp shape. That single observation is the craft — the rest is just repeating it onto nicer things.
This guide is for general educational purposes and reflects manufacturer, museum and safety sources; it isn't professional safety or conservation advice. Follow the specific instructions on your paints, mediums and adhesives, and your local rules for hazardous-waste disposal. The expert observations here are illustrative — the kind of thing an experienced tutor would say — not quotations from a named individual.
FAQ
Can I reuse a paper or card stencil? A few times, but card softens once it's damp with paint. For anything you'll repeat a lot, acetate or plastic lasts far longer.
Do I have to heat-set fabric? Only if your fabric medium requires it — some (like Golden GAC 900) must be heat-set, others (like Liquitex's fabric system) are permanent without it. Always check the label and test first.
Why is my colour patchy? Usually too little paint built up in too few passes, or lifting the stencil early. Add another thin layer before you move it.
Is spray adhesive safe to use indoors? Use it in a well-ventilated room, away from flames or heat, and mask nearby surfaces — it's a flammable aerosol. A window open is enough for occasional craft use.
Sources
- Victoria and Albert Museum — Japanese paper stencils (katagami) collection; corroborated by Fashion History Timeline (FIT), "Katazome," and katagami history overviews.
- "The History of Stencilling" (Palaeolithic hand stencils; Pacific leaf stencils on bark cloth). Secondary craft-history overview.
- Liquitex, "How to Paint on Fabric" (fabric medium; stencilling on fabric; permanent without heat-setting). liquitex.com
- Golden Artist Colors, "GAC 900 Heat-Set Fabric Painting Medium for Wearable Fabrics." goldenartistcolors.com
- Practitioner/educator anti-bleed guidance — StudioR12, "How to Stencil Without Bleeding"; Stencil Me Pretty, "How to Prevent Paint Bleeding Under Stencils"; Artzy Fartzy Creations.
- White spirit Safety Data Sheets (Flam. Liq. 3, H226; hazardous waste; do not drain; ventilate; rag combustion) and ScienceInsights, "What Is White Spirit?"
- Jackson's Art Blog, "Acrylic Painting, Microplastics, and the Environment." jacksonsart.com
- Art & Creative Materials Institute (ACMI), "Materials Safety" (AP/CL seals; ASTM D-4236). acmiart.org
- Golden Artist Colors, "Health and Safety Labeling" (cadmium colours not to be spray-applied). goldenartistcolors.com