How to decorate papier-mâché: paint, pattern and finish
The first papier-mâché box I painted drank my lovely blue straight into the paper, dried patchy and dull, and then — because I got impatient and varnished it too soon — ended up with a permanently tacky lid. Decorating papier-mâché is genuinely easy and enormously satisfying, but there are two or three small things that make all the difference between “homemade” and “handmade,” and nobody tells you them up front.

Starting from scratch? See the companion guide, How to make papier-mâché, then come back here to decorate it. This guide also works for shop-bought blanks.
Here's the good news: those few things take minutes. Seal the surface, choose a forgiving paint, and let each stage dry, and a plain grey shell — one you've made yourself, or a blank from the craft shop — turns into something you'd happily give as a gift. This guide covers paint, pattern, embellishment and finish.
Start by sealing the surface
This is the step that saves your paintwork, and it's the one beginners skip. Bare papier-mâché (and a shop-bought blank) is porous, so paint laid straight onto it soaks in, goes patchy and wastes colour.
Give it a sealing coat first: either a wash of PVA glue and water at 50:50, brushed over the whole surface and left to dry, or — better still for a smooth, bright result — a coat or two of acrylic gesso, which dries hard, fills the paper texture and gives the paint something to grip. Let it dry fully, give any rough patches a light sand, and your surface is ready. (If you've just made the piece, this is the same sealing step the making guide ends on — do it once, here or there.)
Choosing your paint
Almost any paint works on a sealed surface, but they aren't equal for beginners:
- Acrylic is the best all-rounder — opaque, quick-drying, available in every colour, and water-resistant once dry. Two thin coats give deep, even colour.
- Poster paint and gouache are cheap and fine for kids' projects, though less durable and more easily smudged.
- Stone-effect and dimensional paints (from tubs or sprays) add texture and a three-dimensional finish for something more unusual — use sprays in a well-ventilated space.
A quick, honest word on waterproofing, because craft leaflets often overstate it: acrylic is water-resistant, not waterproof, and papier-mâché underneath stays porous. Even painted and varnished, your piece is only water-resistant — never watertight or food-safe. Keep it for dry, decorative use, not for holding liquids or food.
Painting it well
Work from a base coat outward. Lay an even first coat (often white, to make later colours sing), let it dry, then add a second coat for depth — papier-mâché almost always needs two for solid coverage. Let each coat dry before the next, and paint inside and out if the inside will show, as on a box or bowl.
For pattern, let the base colour dry completely, then add your design on top. A lovely simple trick, borrowed from a classic beginner project: paint a box white, let it dry, then add bold spots in a contrasting colour for an instant “Dalmatian” effect — the same principle (dry base, then a second colour over it) gives you stripes, dots, florals or lettering with no special skill. A clean, slightly dry brush gives the crispest edges.
Beyond paint
Paint is only the start. Papier-mâché takes embellishment beautifully:
- Decoupage — glue down torn tissue paper, napkins or printed paper with a thin coat of PVA or Mod Podge over the top for a smooth, patterned surface with no brushwork at all.
- Collage and texture — fabric, ribbon, beads, wooden shapes, pompoms and chenille (pipe-cleaner) stems glue on easily and turn a plain box into a character; a small oval box plus chenille legs and pompoms is all it takes to make a springy little animal.
- A nod to history — the Victorian workshops that made papier-mâché famous decorated their trays and boxes with gilding and inlaid mother-of-pearl, a style called “japanning” that imitated Asian lacquer. You can echo it cheaply with metallic paint pens and a few flat-backed pearl beads.
Varnishing and protecting your piece
A finish coat protects the decoration and unifies the sheen. Once your paint is completely dry — this is where I came unstuck — brush or spray on a clear varnish, acrylic sealer or Mod Podge in gloss, satin or matt. One or two thin coats give a hard, attractive finish and make colours a touch richer.
Two cautions: let the paint cure first (an hour or two at least, ideally longer for thick acrylic) or the varnish stays tacky; and remember that a varnish improves water-resistance but still doesn't make the piece waterproof or washable.
Project one: a decorated gift box
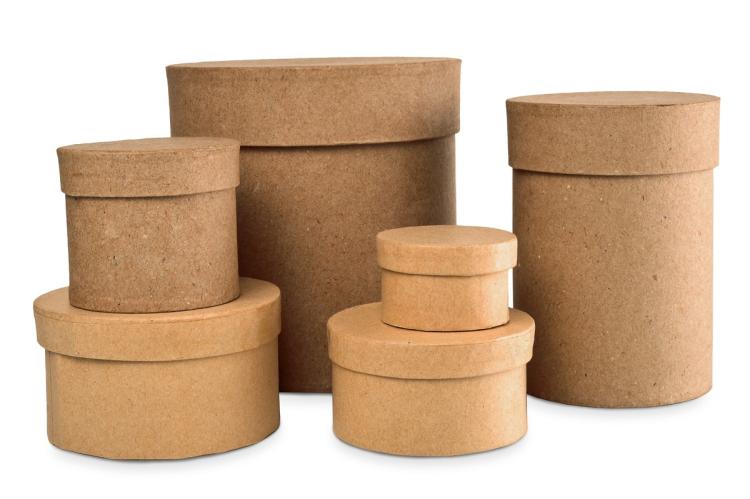
A papier-mâché box makes a reusable, stylish alternative to wrapping paper.
- Seal the box, lid and inside with 50:50 PVA; let it dry.
- Paint the lid and base inside and out, two coats, drying between them.
- Varnish once fully dry, for a protective sheen.
- Dress it — line it with tissue, add your gift, and tie ribbon around it in a bow.
Project two: a springy dog (and cat)
A charming, child-friendly make from a small oval box.
- Paint the box white; let it dry, then add black spots for a Dalmatian.
- Legs: wind four white chenille stems around a pencil to coil them, and glue to the base.
- Tail: glue on a short length of chenille.
- Face: glue a large white pompom to the front of the lid, a smaller one just below for a muzzle, and a little black pompom for the nose; add a scrap of red felt for the mouth and black felt ears.
- Finish with a pair of wobbly eyes. (For a cat, use orange and yellow paint and differently sized pompoms.)
When it goes wrong: quick fixes
- Paint soaks in and looks patchy: you didn't seal first. Let it dry, seal with PVA or gesso, and repaint.
- Streaky or thin colour: build two thin coats rather than one thick one, drying between.
- Tacky varnish: you varnished over paint that wasn't fully dry. Let it cure longer next time.
- Embellishments won't stick: use a stronger craft glue (PVA for paper and fabric; a tacky craft glue for beads and pompoms) and let it set undisturbed.
Clean-up and a word on safety
Clean brushes with warm, soapy water before acrylic dries — once it hardens on the bristles it's there for good. Use spray paints and sealers in a ventilated space, away from children. Acrylic and PVA are generally low-hazard and water-based, but check the label's safety seals, and keep paints, varnishes and small embellishments away from young children and pets.
Decorate something today
Pick up any plain papier-mâché box or shape, brush on a quick coat of 50:50 PVA, and let it dry. That one sealing coat is the single step that turns frustrating, patchy painting into the satisfying kind — everything after it is just colour and play.
This guide is for general educational purposes and reflects craft-educator and museum sources; it isn't professional conservation advice. The expert observations here are illustrative — the kind of thing an experienced crafter would say — not quotations from a named individual.
FAQ
Do I have to seal papier-mâché before painting? Not strictly, but you should — unsealed, it drinks paint and dries patchy. A 50:50 PVA wash or gesso fixes it.
What paint is best? Acrylic: opaque, quick-drying, water-resistant and available in every colour. Two thin coats beat one thick one.
Can I make it waterproof? No — only water-resistant, and never watertight or food-safe, even varnished. Keep it for dry, decorative use.
When can I varnish? Only once the paint is fully dry, or the varnish turns tacky.