Hooked on yarn: A beginner’s guide to crocheting
Finding a hobby that genuinely lets your brain power down is a rare victory. Many popular pastimes still require staring at a glowing screen or analyzing complex rules. Crocheting offers a completely different experience. It requires nothing more than a stick, some string, and the rhythmic movement of your own hands to create something entirely new.
The repetitive motion of pulling yarn through loops acts as a powerful mental reset. As your hands memorize the movements, your mind is free to wander. The tactile feedback of soft wool running through your fingers provides a grounding sensation that helps quiet anxious thoughts and lower stress levels. You are entirely focused on the present moment, one stitch at a time.
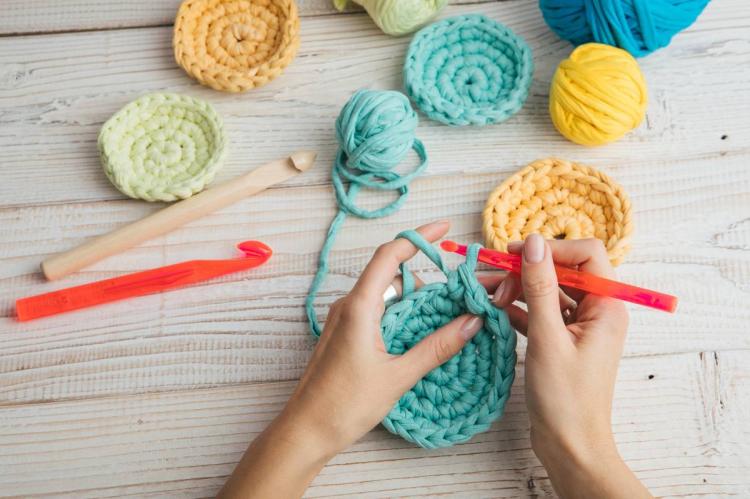
Getting started can feel slightly intimidating when you walk into a craft store and see walls covered in mysterious terminology, hook sizes, and yarn types. The learning curve is actually quite gentle. Once you understand a few basic principles, you will be well on your way to creating blankets, sweaters, and accessories from scratch.
This guide will walk you through the absolute basics of the craft. You will learn how to read yarn labels, choose your first hook, understand the mechanics of a stitch, and finally, complete your very first project.
The Crochet Toolkit
Before you can start hooking, you need the right tools. The crochet aisle might look overwhelming, but a beginner really only needs three basic items to get started: a hook, some yarn, and a pair of scissors. Adding a few inexpensive accessories later will make the process much smoother.
Decoding crochet hooks
Hooks come in various materials, including aluminum, plastic, wood, and bamboo. Aluminum hooks are highly recommended for beginners because the yarn glides smoothly over the metal, preventing frustrating snags. Some hooks feature ergonomic rubber handles, which are excellent for preventing hand cramps during long crafting sessions.
Hook sizes are generally measured in millimeters (like 4mm or 5mm), which refers to the thickness of the shaft. The thicker the hook, the larger your stitches will be. You might also see letters or numbers depending on where the hook was manufactured. A US "H" hook is equivalent to 5mm, while a "J" hook is 6mm. If you are just starting out, a 5mm or 5.5mm hook is the perfect middle ground—not too tiny, and not uncomfortably huge.
Understanding yarn weights
Yarn "weight" simply refers to the thickness of the yarn strand. It ranges from incredibly thin lace weight to massive super bulky roving. Every skein of yarn has a label wrapped around it, which acts as a cheat sheet for that specific skein.
For your first project, look for a "worsted" or "Aran" weight yarn, which is often labeled with a number 4. This medium thickness is easy to hold and makes it simple to see your individual stitches. Avoid fluffy, eyelash, or dark-colored yarns at first. A smooth, light-colored acrylic or cotton yarn will save you a lot of headaches when you are trying to figure out where to insert your hook.
The magic of stitch markers
Stitch markers are small, plastic safety pins designed for crafting. They are the best-kept secret for preventing lopsided projects. Beginners often struggle to identify the very first and very last stitch of a row. By clipping a marker into the first stitch you make, you will know exactly where to stop when you come back across the row. This simple tool prevents you from accidentally adding or dropping stitches along the edges of your work.
Physics of the Hook
Have you ever wondered why a crochet blanket stays together instead of unraveling into a massive pile of string? The answer comes down to a fundamental principle of physics: friction.
When you crochet, you are essentially tying a series of interlocking slip knots. Every time you pull a loop of yarn through another loop, the strands intersect and push against one another. This creates friction at the microscopic level. The more stitches you link together, the more the friction distributes the tension across the entire fabric.
Tension is a word you will hear frequently in the crafting community. It refers to how tightly you hold the working yarn as it flows from the skein into your project. If you hold the yarn too tightly, the friction increases dramatically. Your stitches will become stiff, dense, and incredibly difficult to push your hook through. If you hold the yarn too loosely, the friction drops, resulting in floppy, uneven holes in your fabric.
Finding the right tension takes a little practice. You want the yarn to flow smoothly through your guiding fingers, maintaining just enough resistance to keep the loops sitting snugly on the shaft of your hook.
Starting Your Journey
Every crochet project begins the exact same way. You must attach the yarn to the hook and create a foundational row of loops to build your stitches upon.
Tying the slip knot
The slip knot secures the yarn to your hook while allowing you to adjust the size of the loop.
- Pull about six inches of yarn from your skein. This loose end is called the "tail."
- Make a simple loop with the yarn, crossing the tail end under the working yarn (the part still attached to the ball).
- Pinch the spot where the yarn crosses.
- Reach through the center of the loop, grab the working yarn, and pull a small section of it through the circle.
- Insert your crochet hook into this new loop and pull the tail to tighten it around the shaft of the hook. It should slide easily up and down the metal.
Creating the foundation chain
The chain (abbreviated as "ch" in patterns) is the base of your project. It looks like a series of interconnected V-shapes.
- Hold the hook in your dominant hand. Hold the working yarn in your non-dominant hand, letting it drape over your index finger.
- Pinch the knot at the base of your hook with your non-dominant thumb and middle finger.
- Bring the hook slightly forward, catch the working yarn from underneath, and hook it. This motion is called a "yarn over."
- Pull that caught yarn straight through the loop currently on your hook.
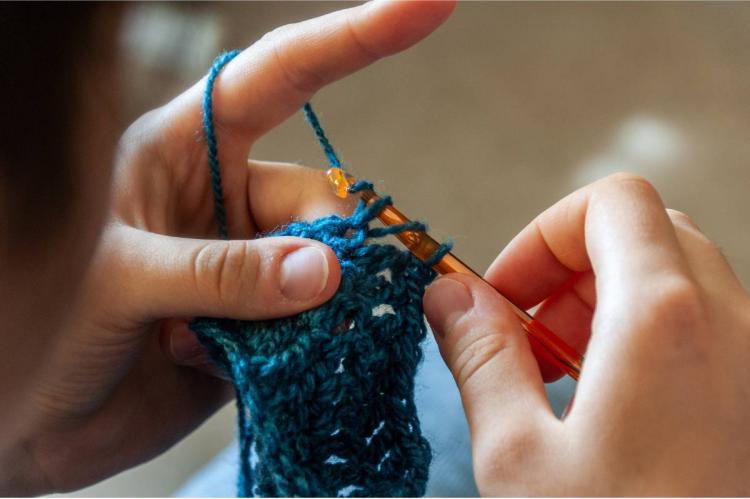
You have just made your first chain. Repeat this process—yarn over, pull through—until you have a long string of chains. Practice making them as even as possible.
The Basic Knits
While there are hundreds of beautiful stitch patterns in the world, almost all of them are built from a few foundational movements. In US terminology, the two most common are the single crochet and the double crochet.
The single crochet (sc)
The single crochet creates a tight, dense fabric that is perfect for winter wearables and stuffed toys.
- Look at your foundation chain. Skip the chain closest to the hook and insert the tip of your hook into the center of the second chain.
- Yarn over, catching the working string.
- Pull that string through the chain. You should now have two loops sitting on your hook.
- Yarn over one more time.
- Pull the yarn through both loops on your hook.
You now have one loop remaining, and you have successfully completed a single crochet. Move to the next chain to your left and repeat the process.
The double crochet (dc)
The double crochet is twice as tall as the single crochet. It creates a looser, more flexible fabric and works up incredibly fast.
- Before inserting your hook into the fabric, yarn over so the string rests over the metal shaft.
- Insert the hook into the designated stitch.
- Yarn over again and pull the string through the stitch. You should now have three loops on your hook.
- Yarn over and pull the string through the first two loops only. You will have two loops left on the hook.
- Yarn over one final time and pull through the remaining two loops.
Your First Masterpiece
Reading about stitches is helpful, but putting them into practice is where the real learning happens. A basic scarf is the ultimate beginner project. It allows you to practice keeping your edges straight and your tension even without worrying about complex shaping or sizing.
For this project, you will need one large skein of worsted weight yarn (number 4) and a 5.5mm crochet hook.
Step 1: The foundation
Create a slip knot and place it on your hook. Chain 25 loosely. This will determine the width of your scarf. If you want a wider scarf, simply add more chains.
Step 2: Row 1
Skip the first chain next to your hook. Insert your hook into the second chain and make a single crochet. Continue making one single crochet in every single chain across the row. When you reach the end, count your stitches. You should have exactly 24 single crochets. Clip a stitch marker into the very last stitch you made.
Step 3: Turning your work
To start a new row, you need to bring your yarn up to the correct height. Chain one. Turn your entire piece of fabric over, like turning the page of a book.
Step 4: Row 2 and beyond
Insert your hook into the very first stitch of the new row (the one directly below your turning chain) and make a single crochet. Clip a new stitch marker into this first stitch. Continue placing one single crochet in every stitch across the row. When you reach the marker from the previous row, remove it, place your final stitch there, and chain one to turn.
Repeat Step 4 until the scarf is long enough to wrap comfortably around your neck.
Step 5: Finishing off
When your scarf reaches the desired length, complete your final stitch. Cut the yarn, leaving a six-inch tail. Yarn over and pull the tail all the way through the loop on your hook, pulling it tight to form a secure knot. Thread the tail onto a tapestry needle and weave it back and forth through your stitches to hide it.
Troubleshooting for Humans
Mistakes are an unavoidable part of the learning process. Even crocheters with decades of experience make errors and have to undo their work.
The art of frogging
In the crafting community, ripping out your stitches is affectionately known as "frogging." You "rip it, rip it" until you reach the mistake. If you realize your scarf is suddenly much wider than when you started, or you spot a glaring hole a few rows down, do not panic. Simply remove your hook, gently pull the working yarn until the mistake unravels, and put your hook back into the live loop to start again. Frogging is a normal, healthy part of the hobby.
Gaining and losing stitches
The most common beginner struggle is accidentally creating a triangle instead of a rectangle. This happens when you drop stitches at the end of a row or accidentally crochet twice into the same space. Counting your stitches at the end of every row is the most effective way to prevent this. Using stitch markers in the first and last stitch of every row eliminates the guesswork of where to place your hook.
Coping with curling fabric
If your foundation row is curving like a rainbow, your starting chain was too tight. The tight chains pull the bottom of the fabric inward, causing the whole piece to warp. Try frogging the work and making your initial chains much looser, or go up half a hook size just for the foundation chain.
The meditative joy of handmade goods
Learning to crochet is a brilliant exercise in patience. Your first few rows will likely look a bit messy, and your hands might feel clumsy holding the hook. That initial awkwardness is a small price to pay for the lifetime of creativity that follows.
As you settle into the rhythm of the stitches, the mechanics will become second nature. You will find yourself reaching for your yarn at the end of a long day to decompress. There is an immense sense of pride that comes from wearing a garment you made with your own two hands, looping a single strand of yarn together thousands of times until it becomes something warm, beautiful, and entirely yours. Grab a hook, pick a bright color of yarn, and let the process unfold.